Self-leveling concrete compounds are widely used by building professionals in flooring projects, but they are designed for specific residential and commercial building applications.
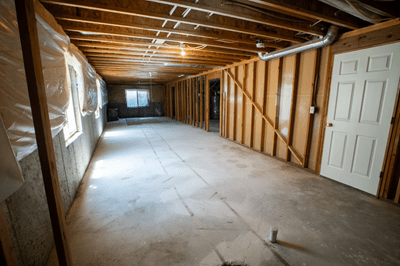
For professional contractors and DIY renovators alike, it can be quite tempting to use these products beyond their design specifications for below-grade applications, where they need to remediate floor depths that exceed the stated maximum limitations of self-leveling compounds.
Our recommendation is always to resist this temptation.
Applying multiple layers of a self-leveling compound at its maximum thickness level until the desired depth has been achieved might seem like a reasonable approach. But it can be prohibitively expensive, in terms of time, effort and material cost.
Doing this may also create a variety of future structural problems, as self-leveling compounds add roughly 12 to 14 lbs. (5.44 to 6.35 kg) of weight per square foot (0.09 m²) at a depth of one inch (2.5 cm).
If, for example, you need to fill a depth of 6” (15 cm), it could require several layers of self-leveling compound, which would not only be laborious and time-consuming but also add more than 70 pounds per square foot (31.8 kg per 0.09 m²).
Even in a small area, this additional weight load could be too much for the substrate to bear, and lead to a structural problem down the road. As such, this approach amounts to a fool’s errand because, even if it can attain a level surface, it would never be approved by a structural engineer.
To achieve deep-fill applications without the massive load addition, the best solution is to use high-density, rigid insulation boards, secured with construction-panel adhesive to fill most of the area, and then finish with a single pour of a MAPEI self-leveling underlayment.

Insulating foam boards of various types are manufactured in different thicknesses, ranging from ½" to 2" (12 mm to 5 cm). These products are often used in conjunction with a vapor barrier to insulate foundation walls, but they also have great applications for floors.
Here’s what you need to know about the two most popular types of foam board:
XPS insulation boards are made through a process of continuous extrusion that produces a closed cell structure. EPS, in contrast, is made by expanding spherical beads in a mold and then fusing the beads together through the application of heat and pressure.
Both products can be used in conjunction with MAPEI products to overcome low spots and excessive flooring depths. But before choosing one over the other, building professionals (and amateurs) should first familiarize themselves with all the technical data available regarding each type of foam board.

Before placing foam boards for deep subfloor leveling applications, make sure that the plywood substrate is clean and the room is free from dust, dirt, debris and excess moisture. Also, remember to fill any floor joist gaps or voids with a patching compound to prevent the self-leveling compound from leaking out.
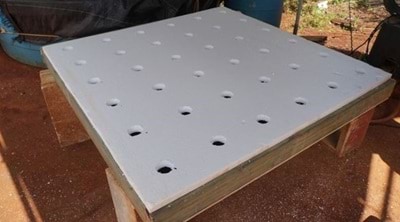
The processes for installing EPS or XPS foam boards are quite similar, but they have one important difference. For EPS foam board, drill 1” (2.5 cm) diameter holes, beginning in the center and moving out at right angles every 12” (30 cm) throughout the foam board. These holes will be filled with the self-leveling compound, creating support pillars for the entire floor.

Note: Insulation boards should be installed to reach 1" (2.5 cm) below the desired finishing height.

Toll-free within Canada:
Technical Services at 1-800-361-9309
Customer Service at 1-800-668-1212
Copyright © 2025 MAPEI Inc. All rights reserved.
2900, avenue Francis-Hughes, Laval (Québec) H7L 3J5
Comments
Load more comments